Skip to Content
Exit

Tag Archive: Design

  1. Shell-Side Fluid Challenges: Increasing the Pressure Drop

    Leave a Comment

    Before fabricating a shell and tube heat exchanger, it must be carefully designed to ensure it’s as helpful as possible to the operation it will be integrated into. There are many considerations to account for. One critical factor is the pressure drop.

    Pressure drop refers to loss of pressure throughout the journey a fluid takes within the heat exchanger. There’s a sweet spot for pressure drop, though that varies depending on what the heat exchanger will be used for, how it’s designed and the types of fluid that will be used.

    In any shell and tube heat exchanger, there is a maximum allowable pressure drop. The engineer’s goal should be to get as close as possible to that measurement without going over it. In many cases, that means taking steps to reduce pressure drop, but in others, steps may need to be taken to increase it, Satyendra Kumar Singh wrote in an article for Process Worldwide.

    In general, higher velocities lead to higher pressure drops. Therefore, when the pressure drop is too high, the designer should find ways to limit the flow rate of fluids. In other cases, when the pressure drop is well below the allowable maximum, it’s an indication that velocity could be increased, and that the heat exchanger may not be reaching its full heat transfer rate potential. In other words, when there’s still room to meet the maximum allowable pressure drop, the designer may be able to work to increase velocity to improve the unit’s effectiveness.

    “Higher velocities lead to higher pressure drops.”

    Increasing shell-side pressure drop

    Pressure drop is related to the flow rate of the fluids within the shell and tube heat exchanger. Therefore, to increase the pressure drop to ensure the exchanger is as efficient as possible, the designer may take measures to allow for greater shell-side velocity.

    Choose a smaller shell

    A smaller shell diameter can increase the flow rate of the shell-side fluid. Shell and tube heat exchangers can be built to be fairly small, so it’s possible for a custom built unit to maximize shell-side velocity. However, it’s important to be aware of how adjusting the size of the shell will impact tube-side pressure drop. Too small of a shell can cause the tube-side fluid to flow too quickly and surpass the maximum allowable pressure drop.

    Adjust baffle spacing and cut

    Baffle spacing plays an important role in fluid flow rate. These metal plates direct the path and control the speed of flow. Placing them closer together can cause the fluid to travel more quickly, increasing the pressure drop as well as the heat transfer rate, according to National Programme on Technology Enhanced Learning, a technology education initiative in India. Again, there are limitations. Baffles should be spaced at least 2 inches apart in exchangers that have a shell inside diameter of 10 inches. In larger shells, baffle spacing should be a minimum of one-fifth of the shell inside diameter.

    Use the right tube configuration

    Because the tube bundle impacts the shell-side flow direction and speed, various tube configurations can affect pressure drop. Tubes arranged in a triangular pattern rather than square allow for faster velocity, and can also contribute to a stronger tube bundle construction, according to John E. Edwards’ “Design and Rating Shell and Tube Heat Exchangers”. However, this arrangement makes cleaning the shell more challenging, so these are most commonly used for exchangers where chemical cleaners will be primarily used on the shell-side.

    Pressure drop challenges are commonly related to too high a flow rate for the equipment, but there are instances where engineers must work to increase velocity and pressure drop to ensure a highly efficient shell and tube heat exchanger. The engineers at Enerquip are excellent at problem-solving and can work with your team to create an effective heat exchanger that meets your needs. Reach out today to begin discussing your heat exchange challenges.

  2. Helpful Details to Consider When Selecting a Heat Transfer Fluid

    Leave a Comment

    The heat transfer fluid (HTF) flowing through your shell and tube heat exchanger plays a large role in determining the effectiveness of your operation. Many options are available for HTFs, including water, steam, mineral oils, silicone-based fluids and glycol-based fluids.

    HTFs flow through either the tubeside or the shellside of the shell and tube heat exchanger, while the product being treated flows through the opposite side. The fluid facilitates either the heating or cooling of the product.

    Choosing the right HTF for your operation involves many considerations. Here are some key details to know about HTFs:

    Cost and Accessibility

    HTF selection shouldn’t be entirely based on cost, but this is a key factor to take into account. The fluid you choose should also be easily accessible so that you can replace it when the time comes.

    Glycol-based HTFs are popular among many industries and applications for both of these reasons, according to a webinar from Process Heating summarized in the Journal of Applied Mechanical Engineering. Silicone HTFs are also common among many industries, Processing Magazine noted.

    Glycol-based HTFs can also be combined with water to reduce the freezing point and increase the boiling point. No other HTF can be diluted with water safely.

    Allocation

    It’s important to choose wisely when determining whether to allocate your HTF to the shellside or tubeside of your heat exchanger. The most beneficial side is one that provides you with the least risk of cross-contamination, easiest cleaning and the safest operation. However, these factors are dependent on the design of the shell and tube heat exchanger, the application and the type of HTF you’re using.

    The tubeside of your heat exchanger is most beneficial if your fluid is:

    • High pressure.
    • Prone to fouling.
    • Corrosive.
    • Likely to solidify.

    A tube bundle is much easier and less expensive to remove and install than a shell, which often requires the replacement of the whole unit. That means if a fluid corrodes tubes beyond safe use, or solidifies to the point of complete obstruction, the bundle can be removed relatively easily and swapped for a new model.

    High pressure fluids are better off on the tubeside because the pressure can be controlled by using smaller diameters. This is much more practically done with tubes than shells, which need to have larger diameters to accommodate the tubes within.

    Finally, tubes are generally easier to clean on most shell and tube heat exchanger designs. Because of this, a fouled tube is simpler to remedy than a fouled shell.

    If your fluid has a low pressure drop or will condense, it may be better off on the shellside. Pressure drop requirements are easily accommodated with careful shell design and baffle placement. Fluids that are highly viscous are also often allocated to the shellside, as these options tend to have low heat transfer.

    Monitoring

    Regardless of which HTF you choose, it’s important to regularly inspect its effectiveness regularly. In time, HTFs will degrade, reducing their heat transfer capabilities and increasing risk of damage or corrosion to the heat exchanger.

    As the HTF degrades, its viscosity and operating temperature will be impacted. Fluids that are past their prime will be less viscous, meaning it’s more resistant to even flow. Lower viscosities require more energy to pump the HTF through the exchanger.

    Continually using degraded fluids will increase the likelihood of the fluid and equipment to overheat. As the fluid decomposes, it may begin to reach higher temperatures, which can damage the product as well as the equipment. Additionally, as the fluid reaches higher temperatures, it will degrade faster.

    Carefully Plan Your Shell and Tube Heat Exchanger

    Choosing your HTF strategically is important to ensuring a safe, effective and sanitary operation. However, it’s just one component in a much larger puzzle. When designing your shell and tube heat exchanger, it’s important to consider the application, working conditions, material selection and the products that will come in contact with the equipment.

    The knowledgeable engineers at Enerquip have broad experience designing and fabricating shell and tube heat exchangers for operations in many industries, including food and beverage, oil and gas, pharmaceutical and more. When you’re determining how to best design your heat exchanger for your operation, reach out to the helpful heat exchange engineers at Enerquip. We can assess your process and all related components, including HTF selection, to design a shell and tube heat exchanger that will benefit your business.

    Need a unit or spare part quickly? We stock a variety of sanitary U-tube exchangers for fast turnaround. 

  3. Metal Expansion Bellows vs. Packed Expansion Joints

    Leave a Comment

    To few engineers’ surprise, shell and tube heat exchangers can get very hot at times. When that happens, the rising temperatures can cause the unit to swell, a process called thermal expansion.

    If a shell and tube heat exchanger is not equipped to handle thermal expansion, the added pressure and changing dimensions of the tubes or shell can cause serious damage to the unit. Tubes and shells often do not expand at the same rate due to differences in material composition, varied temperatures and other factors.

    If, for example, tubes begin to expand faster than the shell, they can cause damage to the interior of the shell. Conversely, if the shell begins to expand, the tubesheet can be negatively impacted.

    Luckily, there are numerous ways to deal with thermal stress before it comes a costly issue. One such method is to install expansion joints. However, these add-ons aren’t a one-size-fits-all solution. There are numerous categories of expansion joints, and each one has its own set of considerations to take into account.

    Two of the most common types of expansion joints are metal expansion bellows (sometimes called packless expansion joints) and packed slip expansion joints.

    Metal expansion bellows: pressure placement

    Metal bellows can either be internally or externally pressurized. The type chosen depends on the application and environment of the equipment.

    Internally pressurized expansion joints

    Internally pressurized expansion bellows are excellent for operations that require frequent inspections of equipment. It’s easier to review the condition of internally pressurized expansion joints than their externally pressurized counterparts, Chemical Processing explained. Additionally, they’re less expensive, making them a cost-effective option.

    However, there are a few downsides to investing in an internally pressurized expansion joint. These designs can’t accommodate large amounts of thermal stress or expansion, particularly when it comes to axial movement. Internally pressurized versions tend to “squirm” under too much pressure, or when accommodating high pressure on long bellows.

    For these reasons, internally pressurized bellows are best used as a cost-effective method to combat small amounts of thermal stress.

    Externally pressurized expansion joints

    Externally pressurized bellows have a few advantages over internally pressurized models, even though they are often more expensive. These are built with a strong outer pipe and an expanding inner lining. This construction also makes them safer because the pressure is contained within the outer pipe, preventing any material inside the unit from escaping, should the bellows fail. Additionally, the outer pipe absorbs shock if there’s an anchor failure.

    These models can handle much greater amounts of thermal stress and expansion, making them ideal in most operations that encounter these types of issues. In situations where internally pressurized versions might squirm or outright fail, externally pressurized bellows can hold strong.

    They can be customized to minimize leakage in the event of an equipment malfunction or damage. Additionally, they can be designed to be self-draining, adding yet another layer of protection against cross-contamination.

    “The size, shape and method of fabrication all determine key characteristics of the bellows.”

    Expansion bellows: wall thickness and construction

    The size, shape and method of fabrication all determine key characteristics of the bellows. To determine the best wall thickness and other qualities for the bellows, fabricators need to know details of the operation, such as how much pressure the expansion joints will need to withstand.

    Thick-walled expansion bellows

    Thick-walled expansion bellows are typically between 4 and 13 millimeters thick, often matching the material and thickness of the shell itself. These designs are primarily used in fixed tube sheet shell and tube heat exchangers. Though they are highly durable, they’re also very stiff and have very limited flexibility. They usually only have two or three convolutions, but the convolutions are exceptionally tall – between 75 and 150 millimeters – compared to thinner walls. Thick-walled bellows are usually made by pressing and welding.

    Thin-walled expansion bellows

    Thin-walled expansion bellows are usually between 0.5 and 2 millimeters thick. While this means they are much more flexible than thick-walled versions, it also means they’re more prone to damage. Because the thin-walled bellows are more pliable, manufacturers can include more convolutions than with thick-walled bellows, and the convolutions are typically between 25 and 75 millimeters tall. Thin-walled bellows are usually made through cold rolling or hydraulic forming.

    For operations that involve high pressures but require the thin-walled bellows, fabricators might opt for a multi-ply construction, where multiple layers of the thin metal lie atop each other to bolster and strengthen the bellows. Another method of reinforcing thin-walled bellows is through installing restraining rings, which are usually located outside the bellows at the root, or the lowest point of the curve, according to a research paper from the International Association for Structural Mechanics in Reactor Technology.

    Medium-walled expansion bellows

    In certain situations, neither thin- nor thick-walled bellows are ideal for accommodating thermal stress, and a compromise needs to be made. Medium-walled models are typically between 2 and 4.5 millimeters thick, offering greater durability than thin-walled versions. They are also more flexible than thick-walled bellows, and have convolution heights of between 50 and 65 millimeters. Medium-walled bellows are usually made by hot rolling.

    Packed slip expansion joints

    Another common type of expansion joint is the packed slip expansion joint, sometimes simply referred to as slip expansion joints or packed expansion joints. This design includes a sleeve which extends outward from the body of the exchanger as thermal expansion increases, as well as packing installed between the sleeve and the body that helps prevent leaking.

    “Packed slip expansion joints are ideal when the thermal expansion causes axial movement.”

    These are more often used with packed floating heads, and are ideal when the thermal expansion causes axial movement. Because these expansion joints are composed of two cylinders – the sleeve and the shell – they can’t expand in any other direction other than left and right (or up and down, depending on the orientation of the unit). Any lateral expansion or rotation due to thermal stress would most likely break these joints, according to Piping Guide, a blog written by engineer Ankit Chugh.

    One of the downsides of packed slip expansion joints is their susceptibility to leakage. Though the packing is supposed to prevent this, it can’t provide a guarantee that no leaks will occur. Additionally, as the material wears away over time through many uses, a leak will become more likely. Because of this, operations where no cross-contamination can be tolerated would be better off using a different type of expansion joint.

    However, where small leaks won’t cause too much concern, a packed slip expansion joint can be an economical way to deal with thermal stress.

    What is the best expansion joint for your equipment?

    Clearly, there are many factors that impact your decision when weighing your options for expansion joints. To determine the best choice for your shell and tube heat exchanger, it may be most helpful to speak to an engineer well-versed in the design and fabrication of these units.

    The knowledgeable engineers at Enerquip enjoy taking on new problems and coming up with the perfect solution for their customers. They’ll work with you to determine your unique needs and find the right expansion joint for your operation. To connect with an Enerquip engineer, request a quote with our simple online form.

  4. 3 Shell & Tube Heat Exchanger Features that Affect Shell-Side Pressure Drop

    Leave a Comment

    Shell and Tube application Shell style can help limit or increase pressure drop.

    Pressure drop is one of the most important design considerations before fabricating a shell and tube heat exchanger. Every heat exchanger has a maximum allowable pressure drop that depends on a number of factors, including what the unit is used for, the fluids incorporated into the process and more.

    The goal of the designer is to allow the shell and tube heat exchanger get as close to the maximum allowable pressure drop without exceeding it. Surpassing this measurement can lead to an inefficient or harmful operation, where the flow rate is too high for the equipment. However, if the pressure drop is well below the maximum limit, it means the fluid could flow faster and therefore increase efficiency.

    Typically, problems related to pressure drop involve having too high a flow rate, leading to excessive pressure. In these instances, designers must come up with creative strategies to limit the pressure to ensure an efficient process.

    There are a number of ways to reduce the shell-side pressure drop that are related to three of the most important elements of shell and tube heat exchanger design: the shell, the tubes and the baffles.

    Shell designs that limit shell-side pressure drop

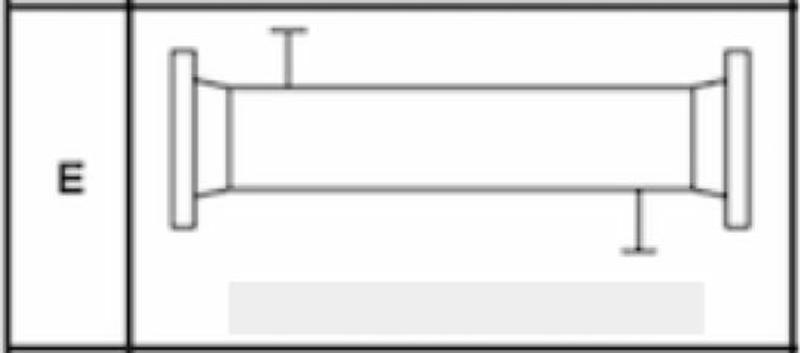
    The most common shell used for heat exchanger design is the E-type, which has one inlet and one outlet valve and allows shell-side fluid to make a single pass.

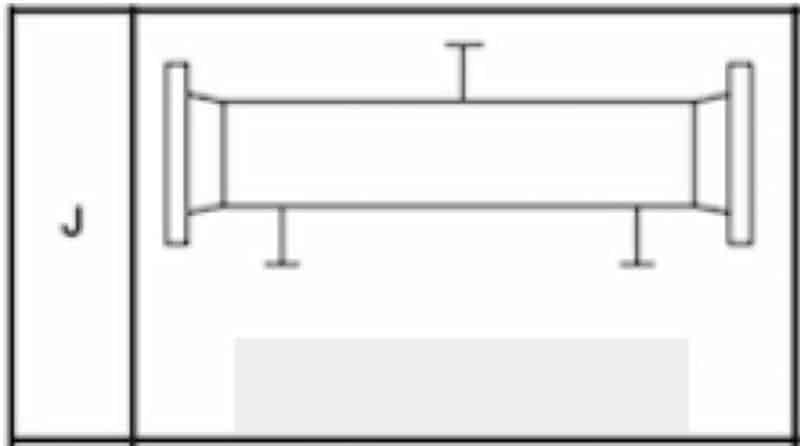
    Though the E-type is most popular, it may allow the pressure drop to exceed the maximum. When this happens, designers can opt for a J-type shell, which has two outlet valves to divide the flow.

    Shell designs that limit shell-side pressure drop

    In other models, the J-type shell is reconfigured to have a single outlet but two inlet valves. This may be referred to as the I-type shell, though that’s not as common.

    Shell designs that limit shell-side pressure drop

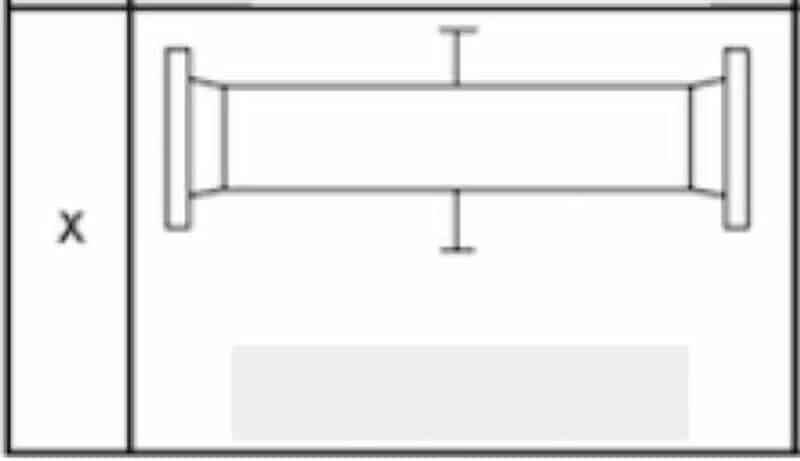
    If the divided flow pattern provided by I- and J-type shells still isn’t enough to limit the pressure drop for an application, designers might turn to the X-type shell. Like the E-type, this shell has one inlet and one outlet valve. However, they are positioned directly opposite each other, rather than one being on the far right side and the other on the far left. X-type shells are most predominantly used for shell-side condensers and gas coolers, according to Thermopedia.

    Shell designs that limit shell-side pressure drop

    If the designer wishes to maintain the shell style but still adjust this section of the exchanger to modify the pressure drop, he or she might consider increasing the shell diameter. A larger diameter means shorter tubes are needed and reduces the flow area. Because of this, flow velocity is slowed down and the pressure drop is lowered.

    Though this may be an effective strategy, there are a few drawbacks to this method. A larger shell diameter means the shell wall needs to be thicker and more tubes are required to get the same results, both of which contribute to higher materials cost. Additionally, shorter tube lengths mean lower tube-side velocity, which can have a negative impact on heat transfer rate.

    Tube configurations that limit shell-side pressure drop

    Tubes arranged in a square pattern tend to lower the shell-side pressure drop, explained John E. Edwards in “Design and Rating Shell and Tube Heat Exchangers”. A square configuration also allows for easier tube cleaning, but aside from these two benefits, there are a few drawbacks to the square pattern. Fewer tubes typically fit in a square pattern, so this design could limit heat transfer capabilities. Choosing a rotated square pattern, in which the shape resembles a diamond, can increase heat transfer rates because it allows for higher turbulence.

    Enerquip Heat Exchanger

    Tube pitch can also be adjusted to limit the pressure drop on the shell-side. Tube pitch refers to the distance between two adjacent tubes, according to Chemical Engineering Progress. Typically, designers may strive to have a lower tube pitch to allow for more tubes to be installed inside the shell, which maximizes heat transfer. However, increasing the tube pitch can limit the shell-side pressure drop by slowing down the flow rate. This strategy is commonly used with the X-type shell.

    Baffle designs that limit shell-side pressure drop

    Baffles – metal plates installed throughout the shell – have multiple important purposes in shell and tube heat exchanger design, one of which is to direct the pattern and rate of flow of the shell-side fluid. The size, positioning and style of baffle can be adjusted to achieve various results, including manipulating the pressure drop.

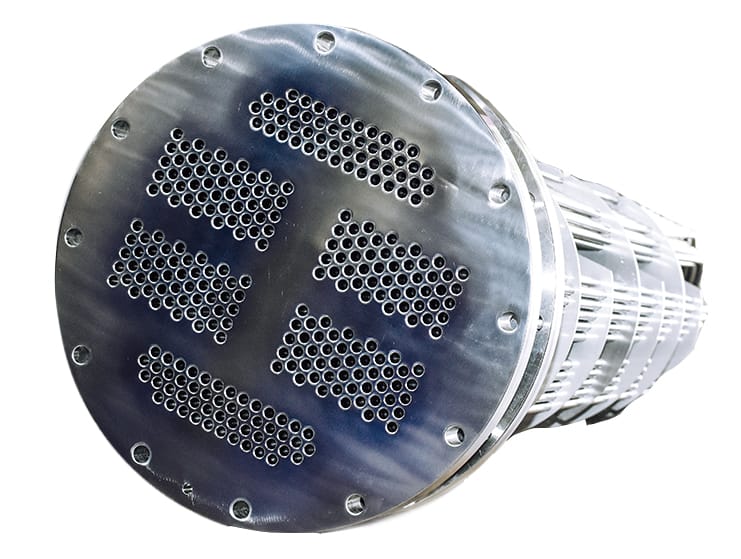
    The most common baffle design is single segmental. With this arrangement, the baffle is nearly a full circle that takes up the whole area of the shell, but with the right third sliced off for the shell-side fluid to flow around it. The next baffle is the same shape, but with the left third cut off. This pattern continues for the entire length of the shell.

    Though this is the most popular style, the single segmental arrangement can allow the pressure drop to rise beyond the allowable maximum. To slow down the flow rate, designers might choose the double segmental style instead. With this design, the circular metal plate’s center third is cut instead of the right or left side. The two remaining thirds are installed across the shell from one another, and the center third is placed as the next baffle placement. This divides the shell-side flow so it goes around the central baffle, then between the side baffles.

    Enerquip Heat Exchanger Baffles

    Space between baffles creates greater cross flow

    The space between baffles can also be increased to allow for greater cross flow, which can decrease the pressure drop. While this may be effective, designers still must adhere to TEMA recommendations for space between baffles. Since these plates also serve as support for the tube bundle, they can’t be placed so far apart that it allows the tubes to shake, separate or break.

    Baffle cut can also make a difference in pressure drop. Baffle cut refers to the percentage of the shell diameter which is removed from the full circle plate. A larger window created by the cut reduces flow velocity, which in turn lowers the pressure drop. Again, there are limitations associated with this method, as too short a baffle may not offer adequate support to the tube bundle.

    Another baffle design consideration to reduce pressure drop is the no-tubes-in-window baffle. Because the tubes and the baffles don’t interact, there’s little need to consider the supportive qualities of the baffles, which means they can be spaced farther apart as long as there are additional measures taken to support the tubes. The major downside of this design option is that much of the shell area is taken up by the baffles, not the tubes, which limits heat transfer ability.

    Determining the best way to reduce pressure drop in your shell and tube heat exchanger depends on a number of factors, and there’s hardly a one-size-fits-all answer. The experienced engineers at Enerquip can help you determine the best way to design a heat exchanger that meets your operation’s needs, including pressure drop requirements.

    Let’s get the conversation started. Request a quote today.

  5. Horizontal vs. Vertical Baffles: Which to choose for your shell and tube heat exchanger

    Leave a Comment

    Baffles are one of the most important structural features of a shell and tube heat exchanger. These metal plates are installed throughout the length of the shell and serve three functions, each equally important to the operation of the unit.

    First, baffles physically support the tube bundle. They also help maintain tube spacing, preventing the individual tubes from shaking, breaking or bending when the rate of flow or heat transfer causes vibration. Finally, they determine the direction of the shellside flow.

    This final purpose – defining the flow path – is critical to the effectiveness of heat transfer and is highly variable. Fabricators have many options in regards to the direction, size and spacing of baffles. One decision fabricators need to make is whether to position baffles vertically or horizontally.

    Horizontal Baffles

    Horizontal baffles are ideal for operations where a single-phase fluid is on the shellside because this prevents deposits from building up on the bottom of the exchanger, Rajiv Mukherjee explained in an article for Chemical Engineering Progress. It also prevents stratification, allowing warmer fluid in the upper region of the exchanger to mix with colder fluid below.

    “Horizontal baffles can often provide a higher heat transfer rate.”

    Horizontal baffles are often the default design, with many shell and tube heat exchanger calculations assuming that baffles will be installed horizontally, Koorosh Mohammadi explained in a thesis written for the University of Stuttgart. Mohammadi found through his studies that orientation has a significant effect on pressure drop and heat transfer rate.

    When the shell and tube heat exchanger doesn’t have any leakage flows, horizontal baffles generally provide the greatest benefit, regardless of shellside fluid. Heat exchangers with horizontal baffles can often provide a higher heat transfer rate because with this type of design, the average distance between the inlet and outlet valves and the first and last baffles is longer than in exchangers with vertical baffles. Because of this, the amount of shellside fluid traveling alongside the baffle itself is greater, which contributes to increased flow between the tubes and baffles, Mohammadi explained in a different paper on which he collaborated with Wolfgang Heidemann and Hans Müller-Steinhagen for the Institute of Thermodynamics and Thermal Engineering at the University of Stuttgart.

    When the shellside fluid moves at a lower velocity, horizontal baffles can help keep the process flowing regularly. Vertical baffles increase the time fluid remains in the shell, which can have a negative effect on heat transfer.

    Vertical Baffles

    Vertical baffles can simplify the fabrication of two-pass exchangers, such as the F-type shell. This style is also ideal for operations where there is condensation on the shell side. The vertical orientation allows the condensate to travel downward toward the outlet rather than being trapped by the baffle itself.

    Mohammadi found that shell and tube heat exchangers with leakage flows perform best with vertical baffles. The benefit is most noticeable when the shellside fluid is gaseous due to the higher dissipation rate of gases compared to liquids.

    “Vertical baffles may be best when a lower pressure drop is desired.”

    The pressure drop seen in heat exchangers with leakage flows and horizontal baffles is much higher than that in exchangers with leakage flows and vertical baffles. As such, for shell and tube heat exchanger designs aimed at minimizing pressure drop, vertical baffles may be best. Mohammadi found that this orientation combined with baffle cuts that are 30 percent of the shell diameter have the lowest pressure drops. Meanwhile, the highest pressure drop was seen in horizontal baffles cut to 20 percent of the shell’s diameter.

    The way baffles are installed into a shell and tube heat exchanger will have a direct impact on the heat transfer rate and pressure drop of the unit. However, the most beneficial baffle orientation depends on the use of the exchanger, the characteristics of the processes it’s used for and the desired effects. Not all processes require the same design, and in many cases, a custom shell and tube heat exchanger provides the best match for a particular operation.

    Enerquip’s shell and tube heat exchanger experts have designed and fabricated custom units for a wide range of industries. They work directly with their clients to ensure the final product is one that’s uniquely supportive of their needs. To learn more about how a custom shell and tube heat exchanger can benefit your operation, fill out our online quote request form.

  6. Three Types of Mechanical Failures in Shell & Tube Heat Exchangers and How to Prevent Them

    Leave a Comment

    Shell and tube heat exchangers are well favored by plant engineers for their long life spans and minimal maintenance needs in addition to their ability to efficiently transfer heat. While stainless steel heat exchangers are reliable and durable for the most part, there are times when stress and extended use take their tolls on the equipment’s components.

    Mechanical failure can appear in several different forms, each with its own symptoms and consequences. When you know what to look for, you can work to prevent mechanical failure in your exchangers or identify an issue quickly so you can solve it promptly. Here are three types of mechanical failure that shell and tube heat exchangers can sustain in time:

    1. Fatigue

    Repeated thermal cycling can lead to fatigue in shell and tube heat exchangers. Fatigue can cause cracking in the tubes beginning with small, hard-to-see striations that can quickly grow larger. Eventually, fatigue cracks can span the diameter of the tube and completely sever it.

    There are several factors that can increase the risk of fatigue or cause it to escalate more quickly. A report on failure analysis of shell and tube heat exchangers from the College of Engineering Pune in Maharashtra, India, explained that the stress ratio can play a big role in contributing to thermal fatigue. As may be expected, when stress increases, so does the risk of failure due to fatigue.

    “Small weld defects can lead to fatigue and severe damage.”

    Another factor that can lead to fatigue faster is poor welding practices, as well as other fabrication shortcomings. In one failure analysis published in Case Studies in Engineering Failure Analysis, engineers determined that a faulty weld joint where the tube met the tubesheet was the catalyst that resulted in failure. After careful review, the team identified a small welding defect, just 0.4 millimeters long, which was the first crack that would eventually lead to dozens of small fractures throughout the tube. With use, the cracks grew and propagated.

    In addition to the welding defect, issues with thermal expansion also caused serious stress on the tube-tubesheet joint. The report noted that it’s best to have expansion positions 15 or more millimeters away from the tube end to lessen the stress expansion would have on the tubesheet. In the failed exchanger, the expansion position was very close to the tube end, which likely caused even greater stress on the already faulty weld joint.

    Avoiding fatigue must begin with fabrication. Even a tiny 0.4-millimeter mistake can lead to severe damage to the exchanger. Additionally, understanding how to adjust your process to reduce stress within the equipment can help.

    2. Metal erosion

    Metal erosion in stainless steel shell and tube heat exchangers negatively impacts the quality of the equipment in two ways. First, as metal erodes away from the tubes, they become weaker and more susceptible to damage. Second, as the protective outer layer of the tubes wears down, the tubes face a higher risk of corrosion. Any corrosion already forming will only get worse as metal erosion takes place, according to Plant Engineering.

    Metal erosion can be caused by excessive speed of flow within the exchanger and by abrasive solids suspended in slurry streams. When a high-velocity stream is divided into thin, sharp jets of fluid upon entering the heat exchanger, it can also lead to metal erosion. In cases like this, the erosion pattern is horseshoe shaped and very localized. Additionally, high temperatures, such as those that allow for flash steam to occur, can also increase the risk of metal erosion. Plant engineers are most likely to see metal erosion occur on the bends of U-tubes or at the tube entrances.

    To prevent metal erosion, it’s important to understand the maximum velocity fluid within the exchanger can reach without causing harm to the components. This largely depends on the materials of construction, the fluid type and temperature, among other factors. Stainless steel fabrication, for example, can handle much higher velocities than a copper shell and tube heat exchanger. Other alloys that contain steel, stainless steel and copper-nickel combinations are also sturdy and can handle higher flow speeds.

    3. Thermal expansion

    As the fluids within the shell and tube heat exchanger transfer heat, the tubes and shell begin to heat up. Depending on the materials of construction, the temperature change, how fast it occurs and other factors, either the tubes, the shell or both may swell, a process called thermal expansion.

    Thermal expansion is fine, as long as you know how to prepare for it. If your exchanger is not equipped or built to handle thermal pressures that cause the metal alloys to widen, it can sustain extensive damage. Plant engineers will most commonly see thermal expansion in exchangers where the cold fluid that’s being heated is valved off, most often in steam-heated exchangers.

    In fixed tube heat exchangers, thermal expansion of the tubes can cause them to grow too large for the tubesheet, causing pull out, warped tubes or a damaged tubesheet. A U-tube shell and tube heat exchanger is a popular deterrent for the potential damages of thermal expansion because the side of the tubes with the U-bend is expected to absorb the heat that leads to swelling, thus saving the fixed side from the stress. However, that doesn’t mean this is an infallible strategy, Mechanical Design of Heat Exchangers explained. In process dealing with very high temperature changes, it’s important to consider all possibilities of thermal expansion and ensure the tubes can handle it.

    Thermal expansion can also be a problem when the fabrication material for the tubes is subject to faster expansion than the fabrication material for the shell. When the tubes swell but the shell doesn’t, it can cause severe damage to both the tubes and the shell.

    Preventing damage due to thermal expansion must begin with the heat exchanger design. First, it’s important to understand the properties of various alloys and how they react in certain conditions. As such, engineers building the exchanger must have a thorough idea of how the exchanger will be used, including information about planned temperatures and the types of fluids that will be introduced to the equipment. If it’s determined that thermal expansion is highly likely, the exchanger can be built to include an expansion joint.

    When designing and fabricating shell and tube heat exchangers, it’s important to have a full idea of what types of mechanical failure the equipment will be at risk for, and to take measures to prevent it. The engineers at Enerquip are well-versed in the many different design options for heat exchangers and can construct a high-quality exchanger for your operation. If you’re looking for the right exchanger for your process, reach out to Enerquip.

  7. 7 Shell Configurations to Consider When Designing a Shell and Tube Heat Exchanger

    Leave a Comment

    The shell is one of the most important components of a shell and tube heat exchanger, but it’s also one of the most complex elements to design, according to Chemical Engineering Progress. While the tubeside design typically deals with one flow stream, the shell has multiple instances of cross-flow and bypass streams.

    Choosing the right shell for your process will help optimize the rate of heat transfer. The Tubular Exchanger Manufacturers Association determines standards for fabricating shell and tube heat exchangers, and classifies shell styles into seven different types:

    TEMA E Shells

    TEMA E Shells
    The E-type shell is by far the most common design, included in more than half of all shell and tube heat exchangers. With this style, the shellside fluid enters the exchanger at the top of one end and exits through the bottom of the other. This one-pass design suits the majority of processes with a few exceptions, Thermopedia explained.

    “Most shell and tube heat exchangers use a single-pass E type shell.”

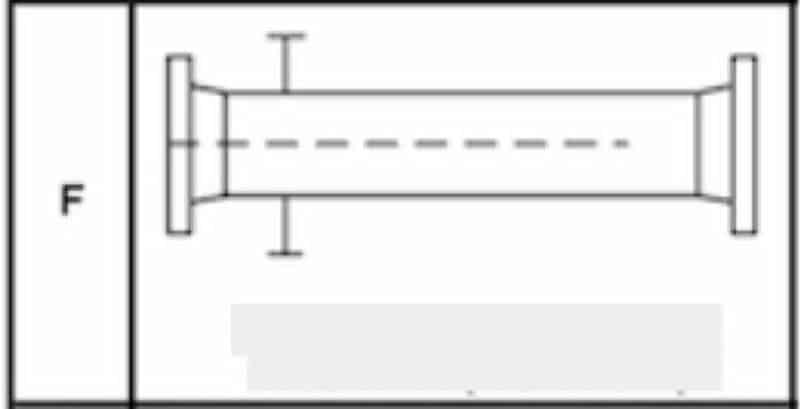
    TEMA F Shells

    TEMA F Shells

    When a process requires a countercurrent stream or a major temperature cross (when the cold stream exits the exchanger at a higher temperature than the hot stream’s outlet temperature), an F type shell can be the answer.

    This is a two-pass exchanger where fluid enters through one side, travels the entire length of the exchanger and doubles back around, leaving through a different outlet on the same side. The two passes are separated by a longitudinal baffle that spans the majority of the length of the shell, but ends before it reaches the far tubesheet. This allows the streams to make the double-pass.

    One common concern with F-type shells is leaking around the baffle. However, there can be steps taken in the design stage to make this less likely to occur.

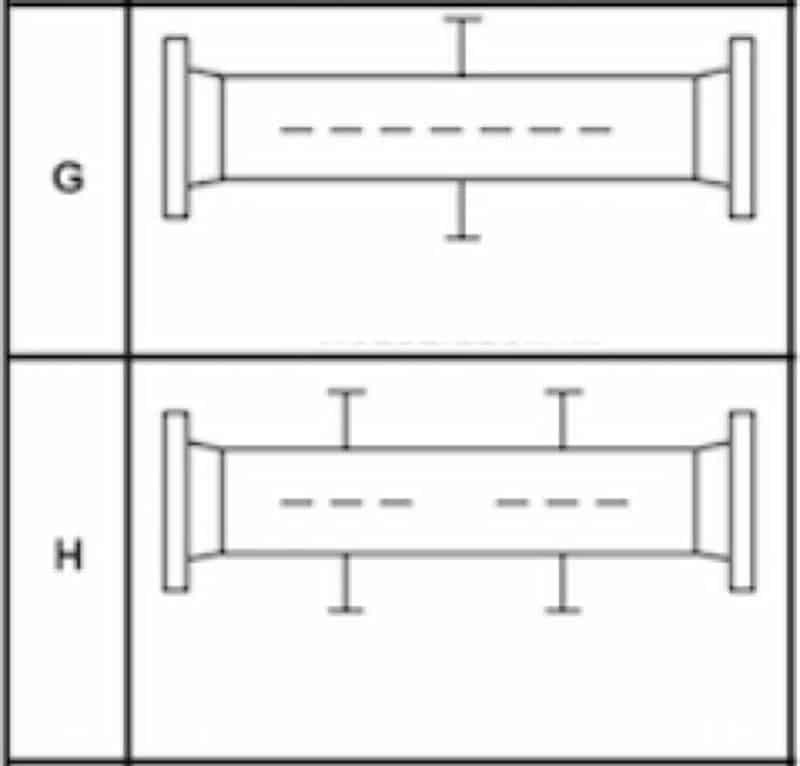
    TEMA G and H Shells

    TEMA G and H Shells

    When the pressure drop needs to be kept low, as in horizontal thermosyphon reboilers, a split-shell design, or a G-type shell, is often employed. There are no baffles in a G-type exchanger and a single support plate is installed in the center of the shell.

    TEMA has specific rules about how long a shell can span unsupported in a shell and tube heat exchanger. The association states that the longest a shell can be unsupported is 1.5 meters, according to CEP Magazine. With just one support plate in a G-type shell, this means that these shells can’t be longer than 3 meters. However, there are applications where a split-shell design is needed at greater lengths. In these cases, engineers can turn to the H-type shell, also called the double-split flow exchanger. Essentially, an H-type shell is two G type shells put together. This means there are two areas where the flow is divided and then reunited, as well as two support plates.

    TEMA J Shells

    TEMA J Shells

    When the pressure drop within an E type shell is too large for the exchanger to handle, there are a few remedies engineers can try. First, adding double segmental baffles could help ease the pressure drop. If this doesn’t work, engineers often turn to the J type shell, also called the divided-flow shell.

    In a J type shell, the fluid enters at the center, splits into two streams (one going right and the other left) and ultimately leaves through two separate outlets. The streams are typically combined again outside the exchanger through a system of pipes. This model is also called a J 1-2 shell. In other models, the fluid can enter at two points, combine and ultimately leave in a single outlet nozzle. These may be referred to as a J 2-1 shell or an I type shell.

    Large pressure drops can cause tube vibration, a problem that could cause damage to the tubes, tubesheets and shell. Because of this, J-type shells are useful for reducing the risk of damage due to vibration.

    TEMA X Shells

    TEMA X Shells

    When an application calls for a pure cross flow design or one that has very low or virtually no pressure drop, the X type is generally best. These are most often used for condensers and gas coolers.

    “X-type shells are best when an application doesn’t permit any pressure drop.”

    With an X-type shell, fluid enters from one side and exits directly opposite. There may be as many inlet nozzles as needed. Having multiple inlets carefully spaced along the length of the exchanger more evenly distributes the fluid across the tubes. X-type shells can also include as many support plates as needed because these run parallel to the flow and won’t interfere with the heat transfer capabilities.

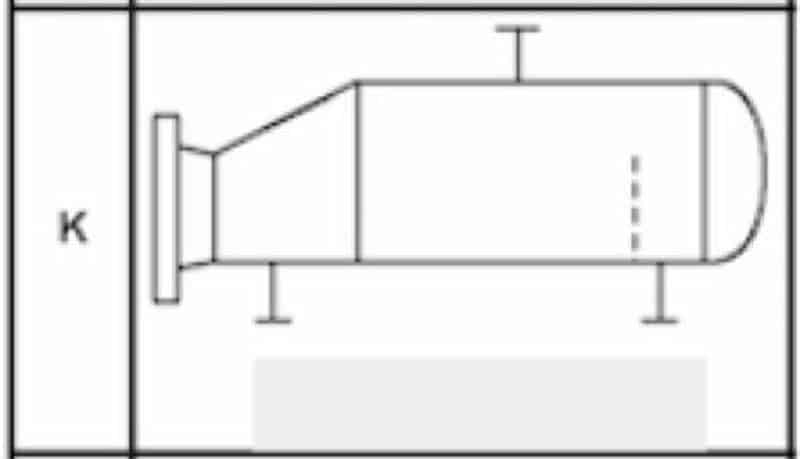
    TEMA K Shells

    x_0_0_0_14141214_800

    The final type of shell that TEMA defines is the K type, which stands for “kettle.” This style is almost exclusively used for kettle reboilers, though it could also be used for chillers. Similar to X-type shells, K models are cross-flow exchangers and allow for as many support plates as needed. They are built with an enlarged shell to allow for vapor disengagement so the shellside liquid carryover is minimized. When K type shells are used in chillers, the shellside fluid is boiled while the tubeside fluid cools.

    When designing the right shell and tube heat exchanger for your process, it’s important to know how different shell configurations will affect the rate of heat transfer, pressure drop, the risk of vibration and more. While the majority of processes can use the E type shell, there’s a chance that one of the other six designs suits your needs better. If you’re unsure, don’t worry: The helpful engineers at Enerquip can help determine exactly what you need.

  8. Tubeside or Shellside: Comparing Fluid Allocation Options for Your Shell and Tube Heat Exchanger

    Leave a Comment

    Every shell and tube heat exchanger will have two fluids: one on the tubeside and the other on the shellside. Chances are, you carefully considered your options for fluids and came to a conclusion based on the needs of your process and the properties of your choices.

    You should take the same thoughtful deliberation when deciding which fluid to put on the shellside and which to the tubeside. The location for each makes a big difference in the effectiveness of heat transfer, maintenance needs and the cost of the exchanger and any replacements.

    Tubeside or shellside? Ask yourself these five questions.

    1. Which fluid is more likely to foul?

    Preventing fouling is one of every shell and tube heat exchanger engineer’s main goals. Measures are taken in the design, materials of construction, fluid selection and cleaning schedule to reduce the chances of fouling. The same should go in decisions surrounding fluid allocation.

    Though fouling should be avoided, it will inevitably happen sooner or later. When it does, you want to make sure cleaning the exchanger is as easy as possible. In most shell and tube heat exchangers, cleaning the tubes is easier than the shell. Therefore, putting your fluid that’s more likely to foul on the tubeside is generally a smart idea.

    Of course, this depends on the heat exchanger design. U-tubes are typically more difficult to clean than straight tubes. However, it’s often easier to reach the shell’s interior for cleaning in these models. So, in exchangers with this configuration, the fouling fluid may be better off on the shellside.

    2. Which fluid is more corrosive?

    Corroded tubes are easier to replace than a corroded shell.If you’re working with corrosive fluids, it’s important to minimize their effect on the shell and tube heat exchanger. This starts with materials of construction – stainless steel fabrication tends to hold up better to common corrosive fluids than carbon steels.
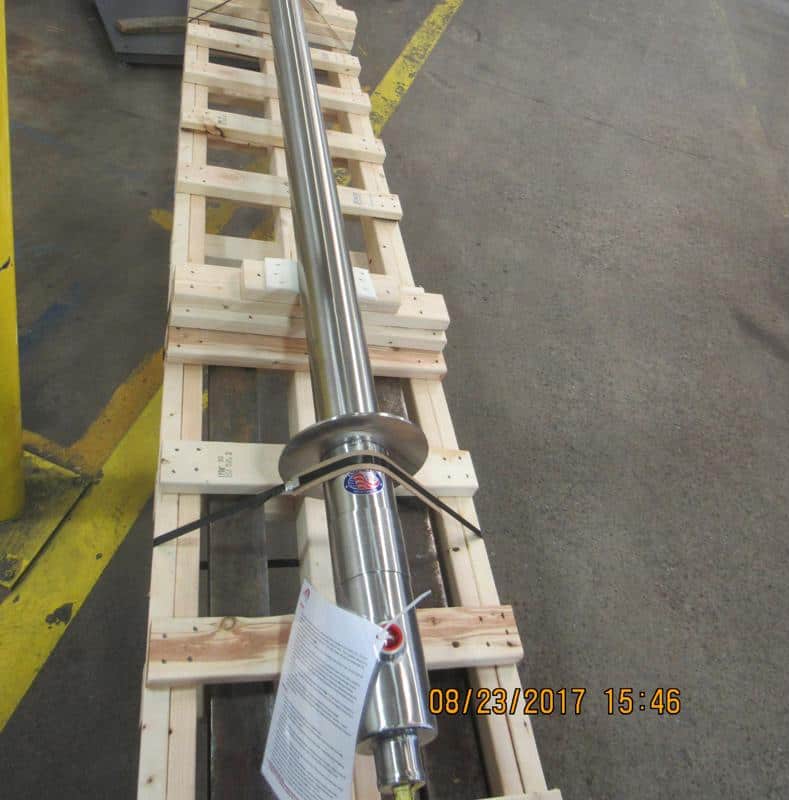
    However, when working with these types of fluids, they will eventually take a toll on the metal. When that happens, you may need to replace the corroded parts of the exchanger. It’s generally easier and less expensive to replace the tubes. Replacing the shell often means replacing the whole exchanger. Because of this, putting the more corrosive fluid on the tubeside can help minimize damage and costs over time.

    Smart Process Design, a chemical engineering blog, pointed out that this also allows fabricators to use different materials of construction for the tubes and the shell, with the more resistant metal used for the tubes.

    3. What states are the fluids in?

    Fluids that are or will become vapors inside the heat exchanger should generally be allocated to the shellside because they have a larger volume and a lower heat-transfer coefficient. This will maximize its heat-transfer coefficient and lower the pressure drop.

    However, vapors that won’t condense may be better off on the tubeside so they won’t become lost or stagnant in the shell’s recesses, which can bring down heat transfer efficiency.

    For fluids that could solidify, it’s best to keep them on the tubeside. That way, should the fluid freeze up, the tubes can be mechanically cleaned, or removed and replaced if necessary. If the frozen fluid were on the shellside, it’d be very challenging to remove the tubes and could require an all-out replacement of the equipment.

    4. Which fluid has the highest pressure?

    High-pressure fluids generally need to be contained by thicker metal walls. Building thicker tubes will require less metal than building a thicker shell, and therefore is less expensive. As such, allocating your highest pressure fluid to tubeside can help keep exchanger costs down.

    5. How viscous are the fluids?

    Generally speaking, more viscous fluids should go on the shellside because these fluids typically have a low heat-transfer coefficient. Putting them on the shellside can maximize heat exchange efficiency. When using this strategy a staggered tube configuration can further improve heat transfer capabilities, as this will promote greater turbulence.

    Viscous fluids also tend to have a higher pressure drop. This further supports putting them on the shellside as a way to minimize the drop, but also necessitates some careful considerations. A fluid with a high pressure drop is more likely to bypass the baffles, which will hurt the heat transfer rate. It can also increase the probability for vibration issues. It’s important to get in front of vibration issues as early as possible, even making adjustments in the design phase as a preventative measure.

    Fluid allocation begins with design

    The right fluid allocation isn’t always obvious. There are multiple considerations to take into account, and some fluid combinations might pose conflicting factors; if both fluids would be better served on the shellside, you’ll still need to choose which one to put through the tubes.

    Knowing which fluids you’ll be using in your shell and tube heat exchanger ahead of the design phase can help immensely in fabricating a custom piece of equipment specifically made for your processes. This will help identify potential fouling, vibration or corrosion issues and work to prevent them from the very beginning.

    When you work with the engineers at Enerquip, you’ll be partnering with a knowledgeable team who loves to solve problems. Reach out to request a quote today.

    More from the Enerquip Blog

  9. Freezing Fouling in Shell and Tube Heat Exchangers: What you need to know

    Leave a Comment

    Fouling is a natural part of heat exchange. However, not all fouling is alike. Some types are more common but less damaging, and many can be anticipated long before installing an exchanger.

    One type of fouling that is relatively less common but potentially very damaging is freezing fouling. It’s important to understand this phenomenon, what causes it, how to prevent it and which measures to take when it does happen.

    What is freezing fouling?

    Freezing fouling, also called solidification fouling, occurs when the fluid inside the shell and tube heat exchanger seizes up and creates a block of substance that is difficult to remove. There are a number of reasons why this might happen.

    Every fluid has a freezing point, and it’s critical that those who work with heat exchangers and the fluids that go inside understand at which temperatures materials will freeze. Intuitively enough, one primary cause of freezing fouling is when the heat transfer surface falls below a fluid’s freezing point, Thermodedia explained.

    This might be the case when using a shell and tube heat exchanger to chill water. If the heat exchanger surface that is in contact with the water (i.e. the tubes if the water was entered on the tubeside) falls below 32 degrees Fahrenheit, the water will begin to freeze. How much it will freeze depends largely on the temperature difference between the tubeside and shellside fluids, among other factors. It could be a matter of a thin sheet of ice on the surface of the tubes (or shell, if the water is on that side), or a thicker mass of ice.

    Moist air can also freeze when coming into contact with a cold surface. Keep this in mind if you’ll be working with low temperatures and anticipate evaporation or mist to result from your process.

    Freezing fouling doesn’t necessarily mean the entire fluid will solidify. When using a solution, there may be various components with differing freezing points. Those ingredients that have relatively higher melting points could be challenging to keep liquid in certain processes. The solution may separate as a result, resulting not only in a partially frozen slurry, but also a liquid with different proportions of components than expected.

    Freezing fouling and crystallization fouling

    Crystallization fouling occurs when some solutes within a solution solidify and begin to accumulate on the heat transfer surface, wrote InTechOpen, an open access science, medical and technology book publisher. Depending on the solute and the conditions, people who work with shell and tube heat exchangers may refer to this phenomena with different terms, like:

    • Scaling, one of the most common, describes solid deposits that are very difficult to remove.
    • Sludge, softscale or powdery deposit describe softer, more porous, mushy or slimy deposits.

    Crystallization fouling and freezing fouling are two different events, but they do have a Venn diagram-like overlap when it comes to waxy deposits. When waxy hydrocarbons from a hotstream come in contact with the cold surface, waxy deposits can form on the heat transfer surface. These types of deposits may technically be crystallization fouling, but many people identify it as freezing fouling.

    Paraffin is one substance in particular that commonly results in a waxy precipitate, according to the Society of Petroleum Engineers’ PetroWiki. Naphthenic hydrocarbons, which like paraffin are found in crude oil, also causes wax-like deposits, but are much softer and referred to as “microcrystalline wax,” often accumulating at the the bottom of the vessel in a sludge-like substance. Since waxes have a high melting point – paraffin’s is generally between 104 and 158 degrees Fahrenheit – these deposits are often seen at ambient temperatures.

    Preventing freezing fouling in a shell and tube heat exchanger

    To avoid freezing fouling in your shell and tube heat exchanger, you must begin with understanding the fluids you’re using and how they respond to different environmental conditions, including temperature and pressure levels. Additionally, when working with solutions that contain solutes with varying freezing points, it’s critical to understand the properties of all components.

    When you know which substances you’re working with, their properties and expected behaviors, you can prevent freezing fouling by not creating the conditions in which they’ll solidify.

    With more complex substances, like crude oil, it’ll be more difficult to determine exactly which conditions will lead to the formation of solid materials. In the case of paraffin, engineers need to know the wax appearance temperature, also called the “cloud point” or “WAT.” This depends on many factors, including the weight and size of paraffin molecules, the ratio of water to oil, the composition of the oil and the presence of other substances that aid in solidification, among others.

    In some cases, freezing fouling could result from a malfunctioning component or an incorrect setting, according to an article for Plant Engineering. This may be the case if your chiller, condenser or evaporator freezes up when it’s not supposed to. In these cases, you may be unprepared for the event, and the ice formation can cause considerable damage if allowed to continue. Much like a pipe bursting during a cold winter, your tubes or shell could pop open with the pressure of the expanding ice.

    If all components are set and behaving as they should, taking precautions ahead of time could prevent a freeze-up. If you’re using antifreeze to prevent it but ice forms anyway, you may need to readjust your concentration of antifreeze. A thermal protection device or control system can also be advantageous. Finally, if you’re preparing your equipment for a seasonal shut-down in the winter, not properly and thoroughly draining your equipment can lead to freezing.

    Responding to freezing fouling

    In some cases, a certain process requires engineers to use substances that may solidify, risking the occurrence of freezing fouling. In these instances, it’s important to be prepared for if and when freezing fouling occurs so you can prevent further damage to the equipment.

    If your freezing fluid is on the shellside, you may be able to warm up the equipment using electric tracing, Chemical Processing noted. Heat exchangers exposed to cold environmental conditions can also be insulated to help prevent damage from the elements.

    However, if you know the fluid is one that would be very challenging to remove in this way, it may be better to allocate it to the tubeside. If it permanently solidifies with little or no hope of rescuing it from the exchanger, you’ll at least be able to remove the tube bundle for replacement; if an unmovable substance sets on the shellside, on the other hand, it’d be nearly impossible to take out. You may wind up needing to invest in an entirely new exchanger.

    If your freezing fouling consists of waxy deposits, you can generally remove these by melting, using steam, hot water or hot oil, or using chemicals to dissolve the wax.

    Freezing fouling may be a constant risk in your operation, or it may be an outlier event. If your equipment has sustained damage due to freezing and need a replacement part or a new custom shell and tube heat exchanger, reach out to the helpful engineers at Enerquip.

  10. What’s the difference between parallel flow, counter flow and crossflow heat exchangers?

    Leave a Comment
    A tube in pipe exchanger can have either a parallel or counter flow pattern.
    A tube in pipe exchanger can have either a parallel or counter flow pattern.

    One of the most critical factors in the efficiency and effectiveness of a shell and tube heat exchanger is flow pattern. Flow pattern refers to the direction that the tubeside fluid runs in relation to the shellside fluid. There are several distinct patterns engineers can choose from:

    • Parallel flow.
    • Counter flow.
    • Cross flow.

    But while each is unique and has its own pros and cons, there are many times when a combination of multiple flow patterns is beneficial, or even necessary. Here’s what you need to know about these three flow patterns for shell and tube heat exchangers:

    A parallel flow pattern, also referred to as a cocurrent flow, is one in which the shellside and tubeside fluids flow in the same direction. This is widely seen in double-pipe heat exchangers and can be replicated in shell and tube heat exchangers as well, according to Bright Hub Engineering.

    “The dramatic temperature difference at the inlet can cause thermal stress in parallel flow heat exchangers.”

    The inlet temperatures of the two fluids may be significantly different, but by the conclusion of the process they’re relatively the same temperature. With parallel flow, the wall temperatures throughout the exchanger will be more uniform than with other flow patterns, Thermopedia noted. When the goal is to wind up with two fluids that have a relatively insignificant temperature gap, a parallel flow shell and tube heat exchanger may be the ideal solution, Engineers Edge explained. When there is a notable temperature gap, the cold-fluid temperature will always be colder than the hot-fluid temperature, Marine Notes pointed out.

    It’s important to note that because the heat exchange rate isn’t as high as other flow patterns, parallel flow heat exchangers need greater heat transfer surface area. As such, it’s critical that facility executives ensure they have the available floor space for their parallel flow shell and tube heat exchangers, as they may be larger than another exchanger with a different flow rate.

    Additionally, the dramatic temperature difference at the inlet can cause thermal stress, which may result in vibrations that lead to equipment damage.

    Counter flow shell and tube heat exchangers

    A counter flow or countercurrent shell and tube heat exchanger’s construction is in many ways identical to that of a parallel flow shell and tube heat exchanger. The main difference is that the tubeside fluid enters the exchanger at the opposite end of the shellside fluid. This results in the two fluids running against each other rather than in the same direction.

    “The counter flow pattern in shell and tube heat exchangers is the most efficient.”

    The counter flow pattern is the most common in shell and tube heat exchangers, primarily because it’s the most efficient. This flow pattern allows for the greatest temperature change between fluids. Additionally, unlike in parallel flow exchangers, the cold-fluid can reach the hottest temperature of the hot-fluid since it exits at the end where the hot-fluid enters.

    The temperature difference in counter flow configurations is more uniform throughout the entire exchanger, which reduces thermal stress that can lead to shaking or motions that can become damaging to the equipment. Further, since the temperature difference is more consistent, the heat exchange rate is also more consistent throughout the exchanger.

    It’s easiest to achieve “true” counter flow, in which both fluids travel perfectly parallel to one another in opposite directions, in double-pipe heat exchangers, although shell and tube heat exchangers can get remarkably close. The baffles typically included in construction causes the shellside fluid to travel up and down within the shell as well as from the front to back (or vice versa), which lends to a somewhat cross flow pattern. The bigger the length-to-diameter ratio of the exchanger, the closer to “true” counter flow the exchanger will experience, Bright Hub Engineering pointed out.

    Crossflow shell and tube heat exchangers

    A crossflow heat exchanger is designed so that the two fluids flow perpendicular to one another. This is typically utilized when one fluid is a liquid and the other is a gas, as in a car radiator in which hot water flowing left and right is cooled by air moving up or down, Bright Hub Engineering explained. Crossflow exchangers are also common in steam condensers, in which a liquid transforms into a gas by the end of the process.

    Combining flow patterns in shell and tube heat exchangers

    In practice, shell and tube heat exchangers are highly complex pieces of equipment, which are integrated into complicated processes. As such, many heat exchangers utilize a combination of multiple flow patterns to accommodate limits related to:

    • Available space for the equipment.
    • Budget.
    • Fluid types to be used.
    • Pressure.
    • Temperature.
    • Weight of the equipment.

    A common combination is counter flow and cross flow, as seen in many multipass shell and tube heat exchangers. As the tubeside fluid flows back and forth between the two bonnets, the shellside fluid runs up and down, guided by baffles installed at regular intervals throughout the equipment. One advantage of this is maximizing the heat transfer rate while also minimizing the floorspace taken up by the exchanger.

    When you’re looking to either add or replace a shell and tube heat exchanger in your operation, it’s important to understand the significance of different flow patterns. The engineers at Enerquip are experts at determining the most beneficial flow pattern for various processes. Reach out to them to get advice, discuss a project or request a quote.