Whether you’re assembling a new unit or changing out a tube bundle during maintenance on your shell and tube heat exchanger, using the right technique protects both you and the equipment. In the videos below, we walk through how to insert a stock sanitary tube bundle, insert a large industrial tube bundle, and safely remove a bundle for service.
How to Insert a Stock Sanitary Tube Bundle
This process covers inserting a tube bundle into a sanitary shell and tube heat exchanger during assembly. As with any tube bundle handling, keep hands and fingers clear of the shell opening and mounting bolts while the bundle is in motion.

Step-by-Step: Inserting the Tube Bundle
- Insert the bundle into the shell. The tube bundle slides into the shell with the baffle kept oriented to the right side, ensuring proper alignment from the start.
- Lubricate the O-ring. A water-based lubricant is applied in a few dabs to help hold the O-ring in place during assembly.
- Seat the first O-ring. The O-ring is placed on the inside and seated fully into its groove to create a proper seal.
- Slide the bundle into position. The bundle is guided in and kept perfectly in line with the shell.
- Lubricate the ferrule groove. Additional lubricant is applied to the outside of the ferrule groove to prepare for the second O-ring.
- Seat the second O-ring. This O-ring is inserted into the ferrule groove and fully engaged to lock it in place.
- Position the ferrules. On a two-pass configuration, one ferrule is set at the top and one at the bottom.
- Slide the water box into place. The water box is slid over the mounting bolts.
- Start the nuts. One top nut is threaded on first to hold everything in place, followed by the corresponding nut on the opposite side.
- Tighten in a crisscross pattern. The remaining nuts (eight total) are added and tightened in a crisscross pattern using an impact driver, lifting slightly on the water box as needed to keep it level.
- Final check. Once all nuts are secure and evenly tightened, the tube bundle installation is complete.
How to Insert a Large Industrial Tube Bundle
Larger industrial tube bundles require crane handling and added care to protect both the technician and the unit.
Step-by-Step: Inserting the Tube Bundle
- Secure the strap. Wrap the strap securely around the center of the bundle.
- Position the gasket. Place the gasket over the bundle, near its resting position in the tube sheet groove.
- Align the lifting eyes. Line up the lifting eyes on the bundle and the shell to ensure proper vertical positioning.
- Lower and insert the bundle with the crane. Slowly lower the crane and insert the bundle. As it goes in, place supports under the unit’s end to help distribute its weight, and move the strap toward the center of the bundle as you work. Safety note: Never use a forklift to lift or insert the bundle. Use a crane only.
- Clamp and secure. Use a clamp to fully insert the bundle, making sure all bolts align with the pre-drilled holes and the gasket is correctly seated in the tube sheet groove before closing.
How to Remove an Enerquip Tube Bundle
Removing a tube bundle for maintenance or replacement follows the insertion process in reverse.
- Insert the pulls. Place pulls into the pre-drilled holes on the tube sheet.
- Attach the crane strap. Thread the crane strap through the eyelets and connect it to the crane.
- Remove the bundle. Carefully draw the bundle out of the shell, keeping it aligned to avoid damaging the tube sheet, gasket, or shell interior.
Need a Replacement Tube Bundle?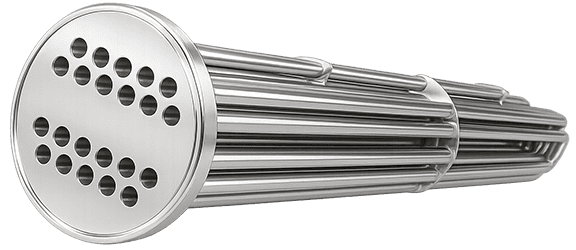
Enerquip offers quick-ship stock and standard tube bundles for many exchanger sizes. Whether you’re replacing an existing Enerquip bundle or another brand, our team can help ensure the right fit and fast turnaround. Request a quote.